
Cabinet Painting: A Comprehensive Guide to Revitalize Your Cabinets
PAGE
By PAGE Editor
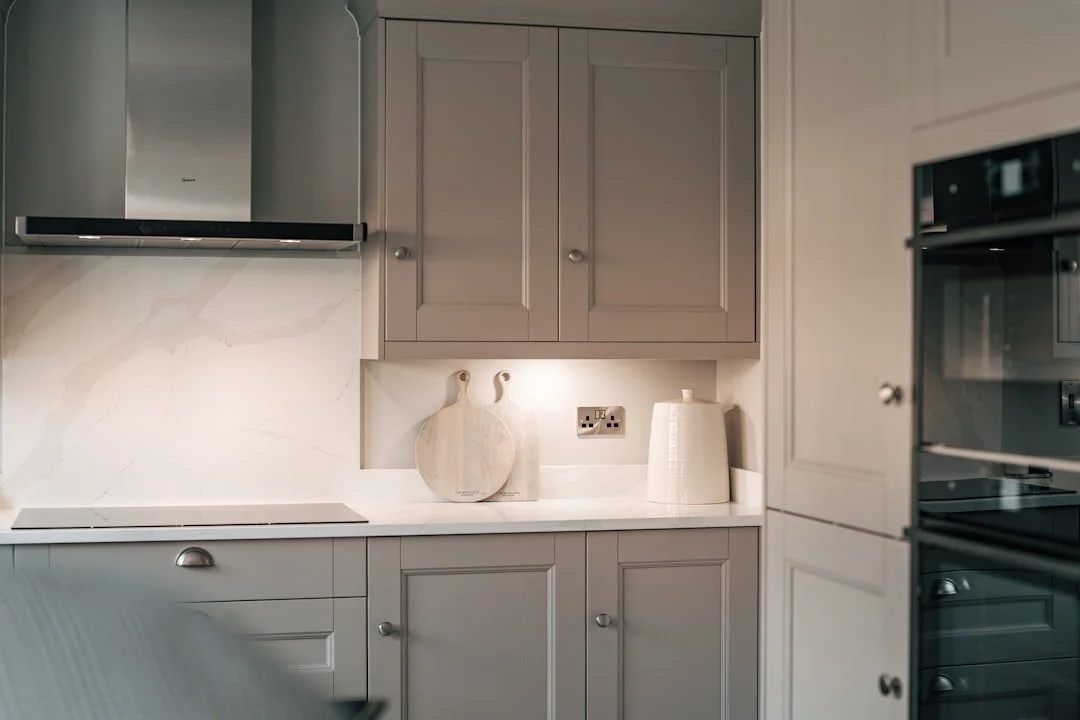
Cabinet painting is a transformative and cost-effective way to refresh your kitchen, bathroom, or any cabinetry throughout your home. Instead of replacing cabinets—which can be costly and time-consuming—painting offers a faster, budget-friendly solution that can dramatically change the look and feel of your space, says redsailpm.com, a leading property management company.
This article will explore the benefits of cabinet painting, preparation steps, types of paint and finishes, techniques, and maintenance tips to help you achieve professional-quality results, whether you choose to DIY or hire professionals.
Why Choose Cabinet Painting?
Painting your cabinets provides several advantages:
Cost Savings: Repainting is far less expensive than replacing cabinetry.
Customization: You can pick any color or finish to match your style.
Explore custom casework fabrication to see how tailored sizing, finishes, and storage features can match your layout. This can help you choose details that fit your space and daily use.
Eco-Friendly: Repainting reduces waste and environmental impact compared to disposal.
Quick Transformation: The process is much faster than a full remodel.
Increase Home Value: Updated cabinets improve overall aesthetics and market appeal.
Types of Cabinets Suitable for Painting
Almost any type of cabinet surface can be painted if prepared properly:
Solid Wood Cabinets: Ideal for painting; sanding and priming help paint adhere well.
MDF (Medium-Density Fiberboard) Cabinets: Popular in modern cabinetry, require sealing before painting.
Laminate Cabinets: Need special primers to bond paint to the slick surface.
Thermofoil Cabinets: Require sanding and primer designed for plastic-like surfaces.
Materials and Tools You’ll Need
Paint stripper (optional, for removing old finish)
Sandpaper (medium and fine grit) or electric sander
Degreaser or cleaning solution
Primer suitable for the cabinet material
Paint (latex, oil-based, or acrylic enamel)
Paintbrushes (angled sash brush recommended)
Foam rollers for smooth surfaces
Painter’s tape
Screwdriver or drill (to remove hardware)
Drop cloths
Protective gear (gloves, mask, goggles)
Step-by-Step Cabinet Painting Process
1. Remove Cabinet Doors and Hardware
Start by carefully removing cabinet doors, drawers, and all hardware such as knobs and hinges. Label each piece so reassembly is easy.
2. Clean Thoroughly
Grease and dirt build up easily on cabinets, especially in kitchens. Clean all surfaces using a degreaser or mild detergent and water. Let everything dry fully.
3. Sand the Surfaces
Lightly sand all cabinet surfaces to remove gloss and rough up the surface for better paint adhesion. Use medium-grit sandpaper (around 120 grit) followed by fine grit (220 grit) for a smooth finish.
4. Remove Dust
Wipe down cabinets with a tack cloth or damp rag to remove sanding dust.
5. Apply Primer
Apply a high-quality primer designed for your cabinet material. This step is crucial to ensure paint adheres properly and lasts. Use a brush for edges and details and a foam roller for flat areas.
6. Sand Between Coats
Once the primer dries, lightly sand again with fine-grit sandpaper to smooth out any imperfections.
7. Paint Cabinets
Apply thin, even coats of paint. Multiple thin coats are better than one thick coat. Use brushes for detail areas and foam rollers for smooth surfaces.
8. Allow Adequate Drying Time
Let each coat dry completely before applying the next. Follow manufacturer recommendations.
9. Reinstall Hardware and Doors
After the final coat has fully cured (which can take several days), reattach hardware and reinstall cabinet doors and drawers.
Choosing the Right Paint and Finish
Paint Types:
Latex Paint: Easy to clean up, low odor, and flexible. Ideal for DIY projects.
Oil-Based Paint: Durable and smooth finish but longer drying times and stronger fumes.
Acrylic Enamel: Combines benefits of latex and oil-based paints, offering durability and smooth finish.
Finish Options:
Matte/Flat: Minimal sheen, hides imperfections but less durable.
Satin: Slight sheen with good durability, popular for cabinets.
Semi-Gloss: Shiny finish, very durable and easy to clean, often recommended for kitchen cabinets.
Glossy: Very shiny and durable but shows imperfections clearly.
Tips for a Professional-Looking Finish
Work in a well-ventilated area to help paint dry evenly and reduce fumes.
Use quality brushes and rollers to avoid streaks and brush marks.
Paint in thin coats and avoid rushing to prevent drips and uneven texture.
Consider spraying paint if you have the equipment and skills for an ultra-smooth finish.
Use painter’s tape to protect surfaces and ensure clean lines.
Common Mistakes to Avoid
Skipping primer or using an incompatible primer.
Painting over dirty or greasy surfaces.
Applying thick coats that drip or pool.
Not sanding properly leading to poor paint adhesion.
Rushing the drying process between coats.
Maintaining Painted Cabinets
Clean with gentle, non-abrasive cleaners and a soft cloth.
Avoid harsh chemicals or abrasive scrubbers that can damage paint.
Touch up any chips or scratches promptly to prevent further damage.
Regularly check hinges and hardware to prevent wear and tear on the painted surface.
DIY vs. Professional Cabinet Painting
DIY Advantages
Lower cost.
Full control over color and timing.
Satisfaction of completing the project yourself.
DIY Challenges
Time-consuming and labor-intensive.
Requires proper tools and skills for the best finish.
Risk of mistakes or uneven results.
Professional Painting Benefits
Expert application and finish quality.
Faster completion.
Warranty and peace of mind.
Access to professional tools like paint sprayers.
Final Thoughts
Cabinet painting is an affordable and impactful way to refresh your home without the expense of full replacement. With proper preparation, quality materials, and patience, you can achieve a beautiful, durable finish that transforms your space. Whether you choose to DIY or hire a professional, understanding the process is key to a successful cabinet painting project.
HOW DO YOU FEEL ABOUT FASHION?
COMMENT OR TAKE OUR PAGE READER SURVEY
Featured


For Autumn/Winter 2026, Saul Nash’s Masquerade explores clothing as a transformative mask, merging tailoring and sportswear to empower fluid identity, movement, and self-expression through performance-led design.